Table of Contents
Background
One day, one of our clients reported that their website had been running slowly lately. To address their concern, I decided to investigate the issue further.
I started by looking at the access.log to find any problems or unusual activity that might be causing the slowdown.
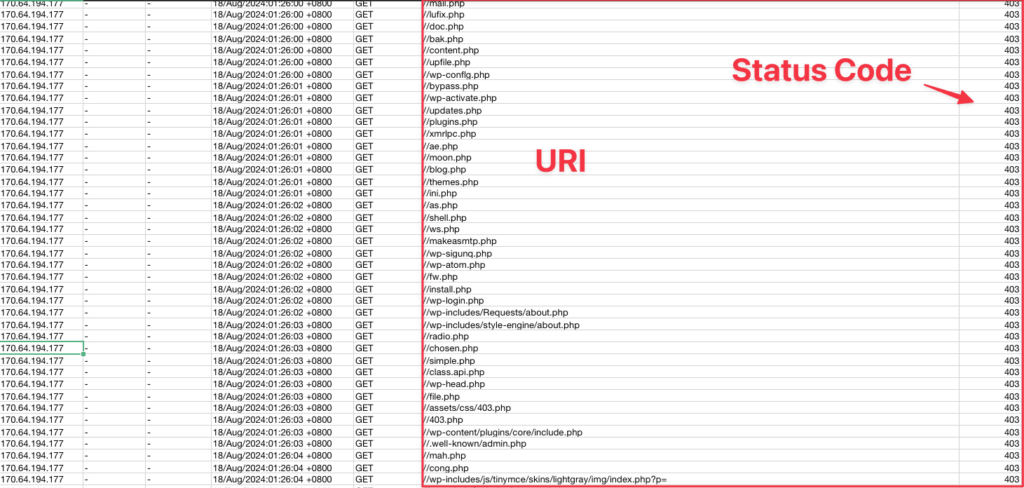
The image above displays the access.log that I’ve converted into CSV format. This makes it easier to open in Excel and apply filters.
From the data, you can see that there are numerous invalid requests. It appears that the user was scanning the website, likely looking for a backdoor or other vulnerabilities. This kind of activity often indicates an attempt to find weaknesses in the site’s security.
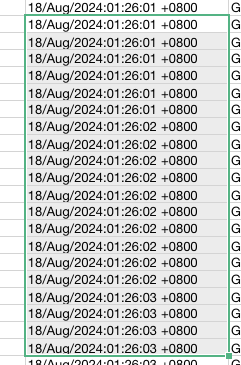
Additionally, if you look closely, you’ll notice that the time between requests is just 1 second, and some requests are even sent simultaneously. This clearly indicates that the activity is being performed by a script or bot designed for scanning the website.
There is also spam request targeting xmlrpc.php, as shown in the image below. This further suggests malicious intent, as the spam requests are likely part of an attempt to exploit or test vulnerabilities in the site.

According to NiagaHoster, XMLRPC is a file included in the basic WordPress installation. XMLRPC enables remote connections between a WordPress site and external applications. This allows various functions, such as publishing content from third-party apps or managing data through an API.
If you’re not using XMLRPC at all, it’s best to disable access to this file to enhance security. Disabling it can help prevent unauthorized access and potential exploitation.
Installing Fail2ban
Fail2ban can be installed by running this command:
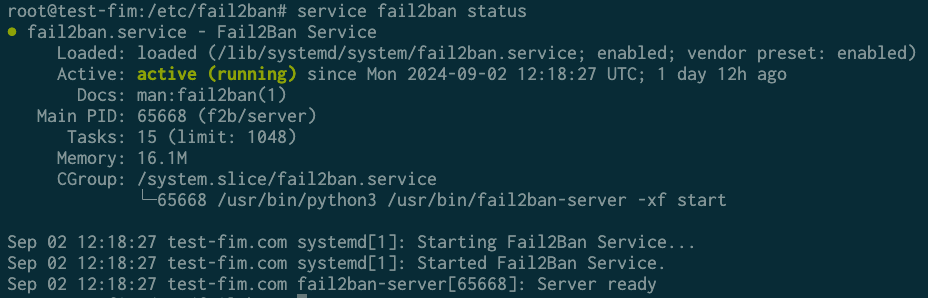
sudo apt-get install fail2banRun this command to see the status of fail2ban
service fail2ban status
Creating a Filter
Filters in Fail2Ban are essential for extracting and analyzing data from our access_log. By applying these filters, Fail2Ban can detect patterns of suspicious activity within the logs. This helps us identify potentially harmful behavior and block the IP addresses associated with these patterns.
Once Fail2Ban recognizes such patterns, it automatically takes action by blocking the IP addresses involved in the suspicious activity. This automated response enables us to handle security threats more efficiently and effectively, reducing the need for manual intervention and improving overall security management.
Based on the logs above, we will create two filters:
-
Requests to xmlrpc.php with a return code of 400: This filter will specifically target and block requests to the xmlrpc.php file that result in a 400 status code, indicating a bad request.
-
Requests to any .php file with a return code of 403: This filter will catch and block random requests that return a 403 status code, which signifies forbidden access.
xmlrpc-400.conf
[Definition]
failregex = ^<HOST>.* "POST /xmlrpc\.php.* HTTP.*" 400
ignoreregex =
http-404.conf
[Definition]
failregex = ^<HOST> - .* "GET /.*\.php.* HTTP/.*" 403 .*
ignoreregex =
Above are the two filters I’ve created. Both of these filters are placed in the /etc/fail2ban/filter.d/ folder.
After that, we’ll move on to the next step, which is adding a new jail.
Add New Jail
This step involves configuring Fail2Ban to use the filters we’ve created, allowing it to monitor specific types of activity and take action when necessary. By setting up a new jail, we can ensure that our filters are actively protecting the system by automatically blocking any suspicious IP addresses identified in the logs.
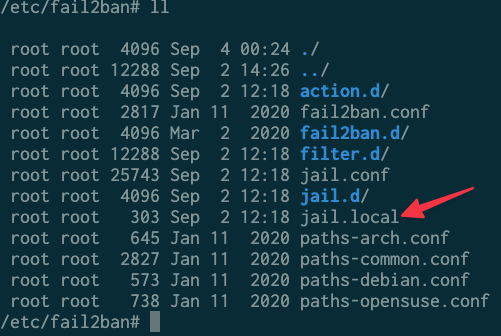
Next, add the following lines of code to the /etc/fail2ban/jail.local file:
[xmlrpc-400]

enabled = true
filter = xmlrpc-400
port = "http, https"
logpath = /var/log/nginx/access.log
maxretry = 3
bantime = 72h

[http-403]
enabled = true
filter = http-403
port = "http, https"
logpath = /var/log/nginx/access.log
maxretry = 3
bantime = 72h
In this section, we can define several configuration settings. For example, maxretry = 3 means that an IP will be banned after 3 failed attempts that match the pattern defined in the filter.
The bantime setting specifies how long the IP will remain banned. In the example above, I’ve set bantime to 72h, which means the IP will be banned for 3 days.
After adding the above configurations, don’t forget to save the file and restart Fail2Ban by running the following command:
service fail2ban restart
This ensures that your changes take effect and that Fail2Ban starts monitoring and protecting your system based on the new rules.
Testing fail2ban rules
The final step is to test the rules we’ve created. You can do this using the fail2ban-regex command. This command allows you to check if your filters are correctly identifying the patterns in your logs.
The command format is as follows:
The final step is to test the rules we’ve created. You can do this using the fail2ban-regex command. This command allows you to check if your filters are correctly identifying the patterns in your logs.
The command format is as follows:
fail2ban-regex /path/to/log /etc/fail2ban/filter.d/filter-name.confFor instance, if I want to test the xmlrpc-400.conf filter, I would run the following command:
Fail2ban-regex /var/log/apache2/access.log /etc/fail2ban/filter.d/xmlrpc-400.confHere’s the output
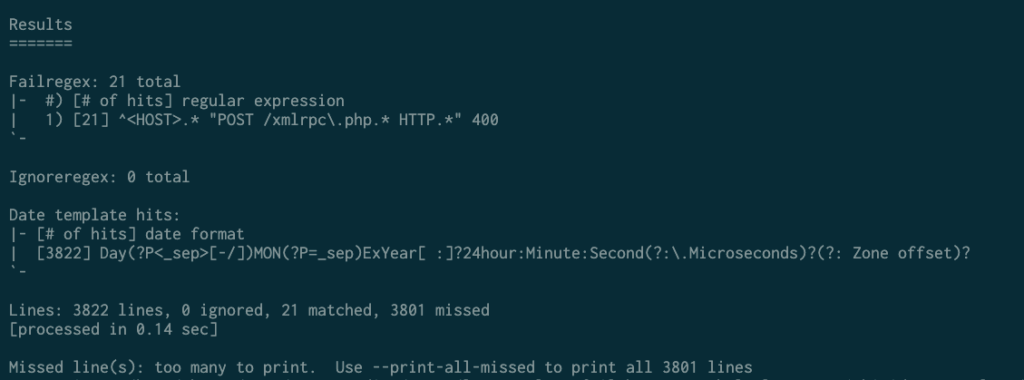
To see which requests match the filter you’ve created, you can add the --print-all-matched argument. This will show all the log entries that match your filter.
fail2ban-regex /var/log/apache2/access.log /etc/fail2ban/filter.d/xmlrpc-400.conf –print-all-matched
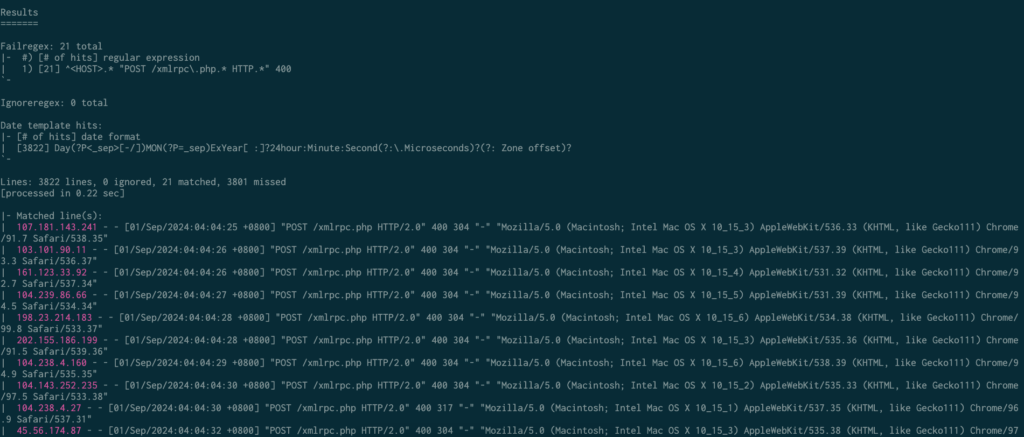
This is incredibly useful for ensuring that the filter you’ve created is valid. It helps you verify that only the intended requests are being blocked, and not legitimate traffic. This way, you can avoid mistakenly blocking valid requests, which could otherwise cause issues for your website or application.
Unban IP
Sometimes mistakes can happen—I’ve experienced this myself. Due to an error in a filter I created, I accidentally banned the IP of a real user, leading to complaints about not being able to access the website. In such cases, the solution is to unban the IP by running the following command:
fail2ban-client set <yourjailname> unbanip <ipaddress≥
After running the command, the user will be able to access the website again.
Conclusion
After setting up Fail2Ban, we’ve seen a significant reduction in server resource usage, and the website is no longer experiencing slowdowns. By blocking IP addresses that were making suspicious or excessive requests. This has led to a much smoother and faster experience for users. The website is now running more efficiently, and overall performance has greatly improved. This not only enhances user satisfaction but also helps maintain the site’s reliability and responsiveness.