Table of Contents #
Welcome to Invoize! Setting up your payment methods is a crucial first step to ensure you can receive payments from your clients efficiently. This guide will walk you through the process of configuring different payment options, from traditional bank transfers to modern payment gateways.
Step 1: Navigate Payment Settings #
Log in to your Invoize dashboard and navigate to the payment configuration page by clicking on: Settings > Payments. This is your central hub for adding, editing, and managing all your payment options.
Step 2: Add Your Payment Methods #
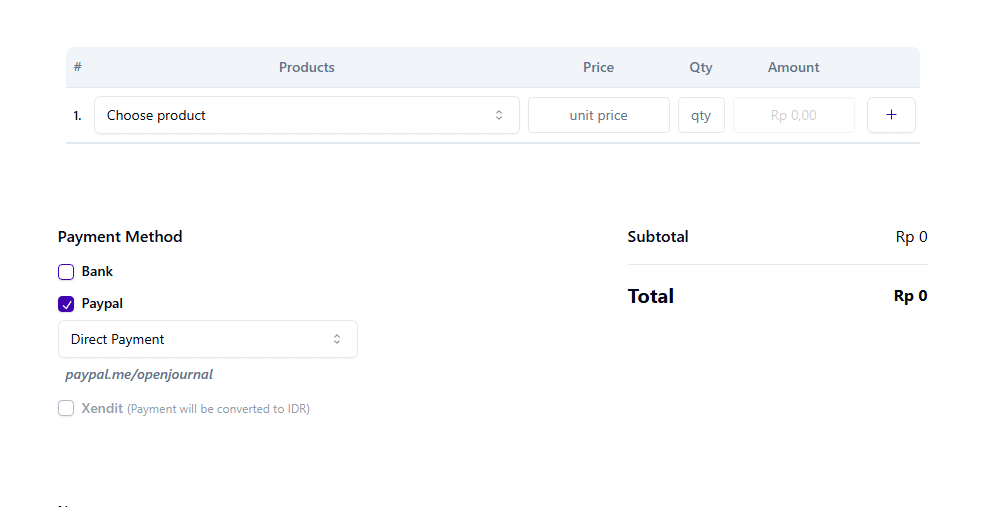
Please select the payment method you want to use to receive payments. You can choose one of the following options:
- Bank Transfer – For receiving manual payments directly to your bank account.
- PayPal – For fast and secure payments via email or API.
- Xendit – For accepting a variety of local payment channels like eWallets, Virtual Accounts, and QR codes.
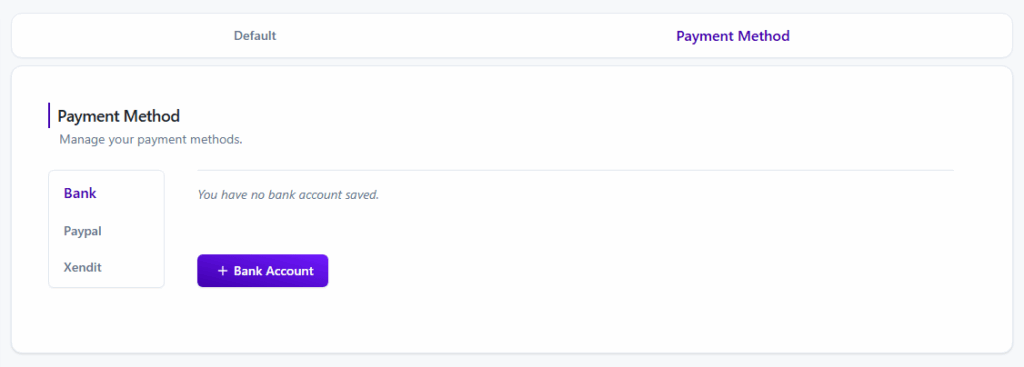
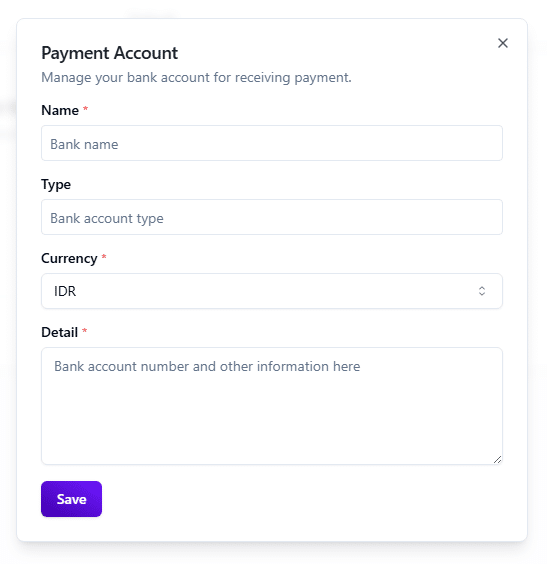
Bank Transfer #
This is a direct payment method where you provide your banking information to clients.
To fill out the Payment Account form, you need to enter the following details: #
- Name: Enter your bank’s name (for example, Bank Central Asia).
- Type: Specify the type of your account (e.g., Savings or Checking).
- Currency: Select the currency used by your account (e.g., IDR).
- Detail: Enter your bank account number and the account holder’s name here. For example: “Account Number: 123456789 a/n Account Holder’s Name.”
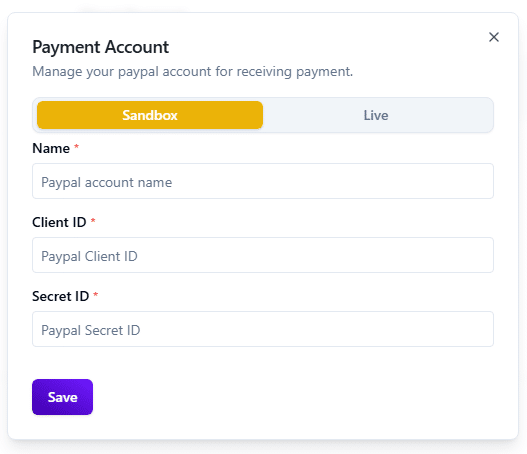
PayPal #
Easily integrate PayPal to accept payments via email or API.
- Email Method (Easiest): Simply enter the email address linked to your PayPal business account. When a client pays, the money will be sent to this email.
- API Method (Recommended for Automation): For an automated and professional experience, connect your PayPal account using your API credentials.
Enter yourClient IDandSecret Keywhich can be found in your PayPal Developer Dashboard. - Mode: Use
Sandboxfor testing payments with dummy data, and switch toLivewhen you are ready to accept real payments.
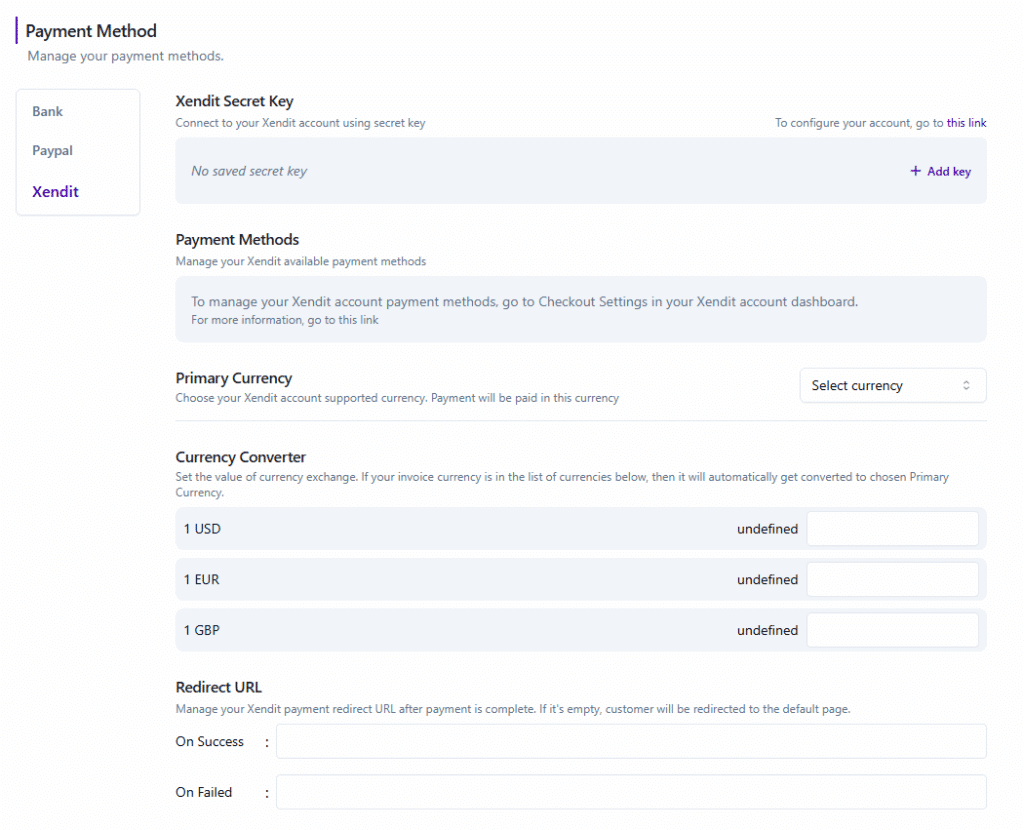
Xendit #
Connect your Xendit account to offer a wide range of local payment channels, like eWallets and Virtual Accounts.
- Xendit Secret Key: This section is for connecting your account using your Xendit secret key. It indicates that no key is currently saved and provides a button to add one.
- Payment Methods: This area is a reference section. It informs you that to manage which payment methods are available (like e-Wallets or Virtual Accounts), you need to go to your “Checkout Settings” in the Xendit dashboard itself.
- Primary Currency: Here, you can select the primary currency for your Xendit account. All payments will be processed and paid out in this selected currency.
- Currency Converter: This feature allows you to set manual exchange rates for currencies like USD, EUR, and GBP. It mentions that if an invoice is in a different currency, it will be automatically converted to your selected primary currency.
- Redirect URL: This section lets you specify a URL where customers will be redirected after they complete a payment. You can set different URLs for a successful payment and a failed payment.
Step 3: Test Your Payment Methods #
Before going live, it is highly recommended to test all your payment methods to ensure they are working correctly.
- Create a Test Invoice: Generate a small test invoice with each payment method.
- Simulate Payment: Follow the payment process to confirm that the transaction flows smoothly and that your account is correctly credited.
Contact Us #
Support: If you have any questions, need assistance, or would like to share feedback, you can click here.