Table of Contents #
Quotations (also called price offers or estimates) are one of the most important documents in business. With Invoize, you can create, manage, and send professional quotations in just a few clicks — all directly from your WordPress dashboard.
This guide will walk you through the entire process step by step.
Requirements #
Before you begin, ensure that:
- The Invoize Pro plugin is installed and activated.
- Company information (logo, business name, address, contact details) is configured.
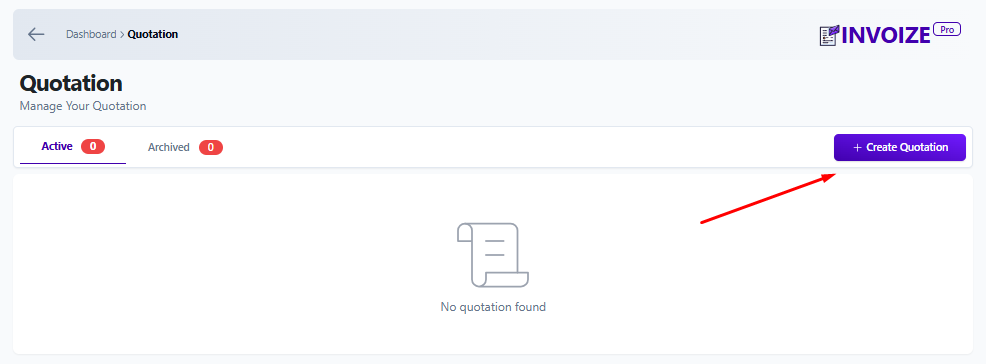
Create a Quotation #
Step 1: Access the Quotation Module #
- In your WordPress dashboard, go to Invoize → Quotation.
- Click + Create Quotation to open the creation form.
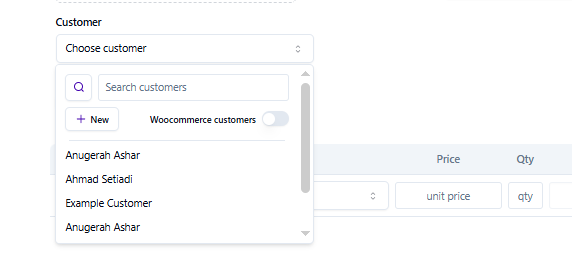
Step 2: Enter Customer Information #
- Select a customer from the dropdown.
- Enable Same as customer if the billing details match
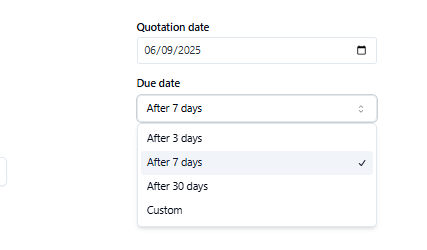
Step 3: Configure Quotation Details #
- Quotation number: Auto-generated.
- Quotation date: Select the issue date.
- Due date: Define the quotation validity period (e.g., 7 days).
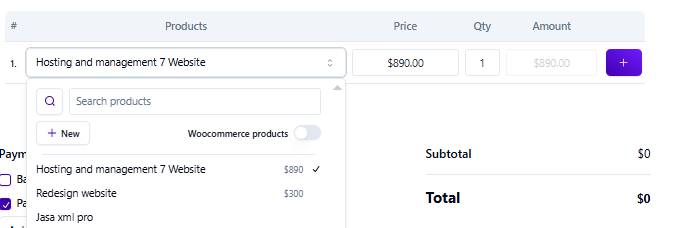
Step 4: Add Products or Services #
- Select products/services from your catalog.
- Enter unit price and quantity.
- Subtotal and total amounts are calculated automatically.
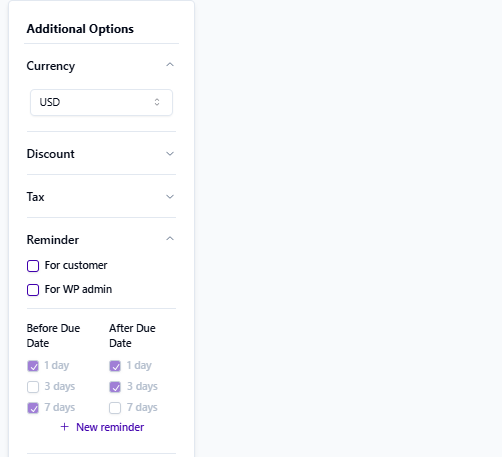
Step 5: Adjust Additional Options #
- Currency: Choose the preferred currency.
- Discount: Apply a fixed or percentage discount.
- Tax: Add applicable tax rates.
- Reminder: Set reminders for customers or admin before/after the due date.
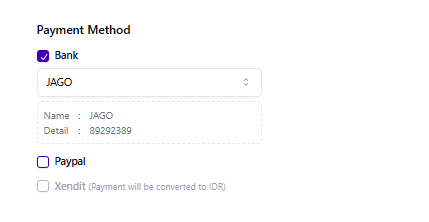
Step 6: Select Payment Method #
- Available methods include Bank Transfer, PayPal, and Xendit.
- Optionally enable Auto Confirmation for automatic payment updates.
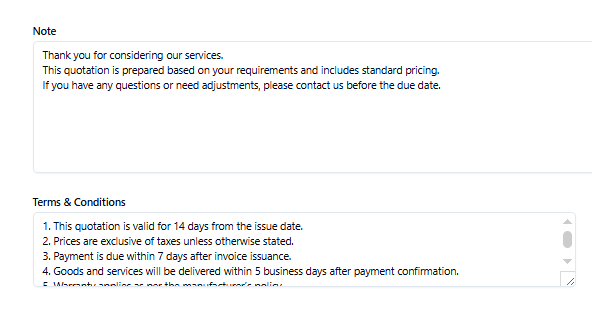
Step 7: Add Notes and Terms #
- Notes: Add internal or customer-specific instructions.
- Terms & Conditions: Define policies such as refund, delivery, or warranty terms.
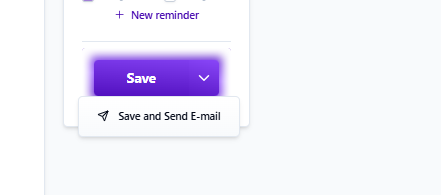
Step 8: Save and Send #
- Click Save Draft to keep the quotation as draft.
- Click Publish to finalize.
- Once published, you can send the quotation via email, export it as PDF, or share
- it using a link.
Manage Quotations #
- In your WordPress dashboard, go to Invoize → Quotation.
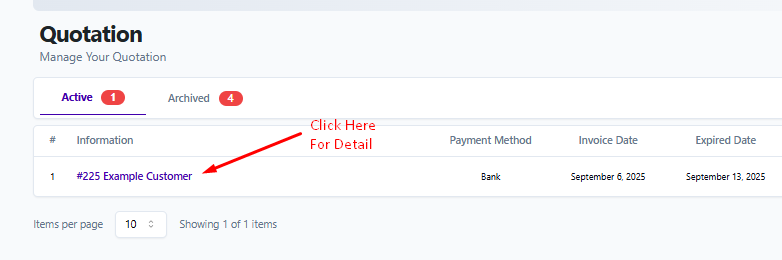
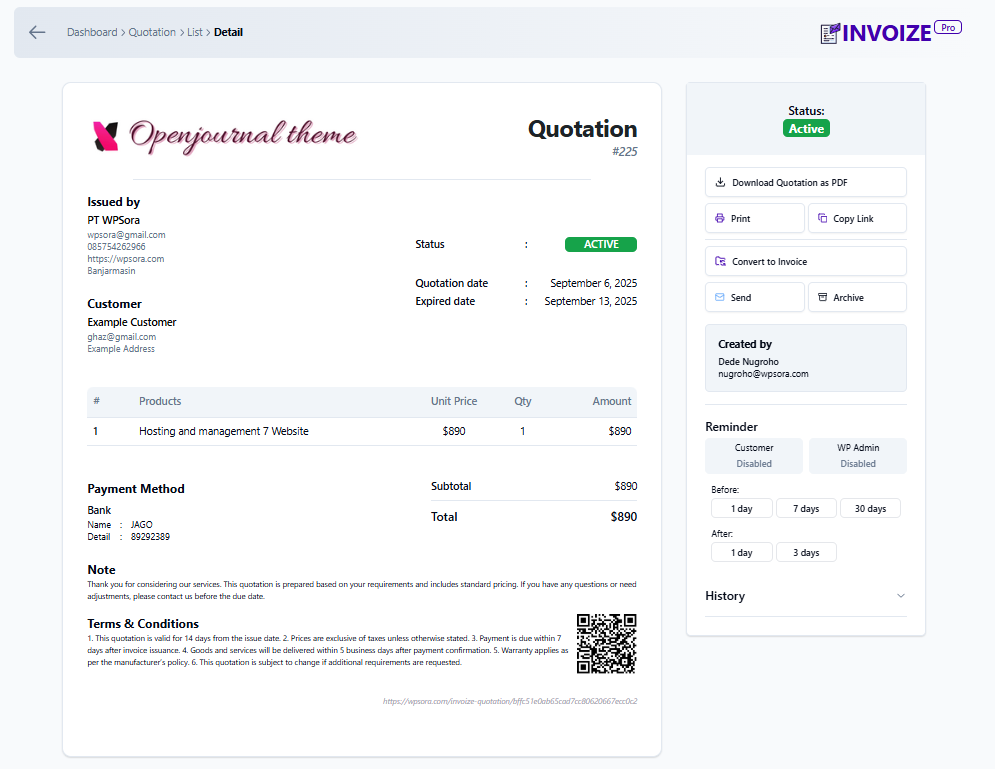
This section provides tools and quick actions for managing the quotation:
- Status Badge → Displays current status (e.g., Active, Expired).
- Download Quotation as PDF → Export and save the quotation as a PDF file.
- Print → Print the quotation directly.
- Copy Link → Share a public link of the quotation with your customer.
- Convert to Invoice → Instantly turn the quotation into an invoice.
- Send → Email the quotation directly to the customer.
- Archive → Move the quotation to your archive for record keeping.
- Created By → Shows which user/admin created this quotation.
- Reminder Settings → Automate reminders for both customer and admin before or after the due date.
- History → Activity log that records actions related to this quotation (e.g., created, sent, updated).
Best Practices #
- Always define a due date to prevent outdated offers.
- Double-check product prices, discounts, and taxes before sending.
- Use company branding for a consistent and professional look.
- Enable reminders to follow up automatically with clients.
Contact Us #
Support: If you have any questions, need assistance, or would like to share feedback, you can click here.